In this article
- Why the Same Recipe Fails in Different Seasons
- Temperature: The Master Variable
- The Desired Dough Temperature Formula
- Summer Example
- Winter Example
- Why It Matters
- Summer Adjustments: Slowing Everything Down
- Starter Management in Summer
- Water Temperature
- Inoculation Percentage
- Bulk Fermentation
- Cold Retard Strategy
- Winter Adjustments: Giving Fermentation the Help It Needs
- Reviving a Cold Starter
- Water Temperature
- Inoculation Percentage
- Creating a Warm Spot
- Bulk Fermentation
- Proofing Adjustments
- Spring and Autumn: The Easy Seasons
- Seasonal Quick-Reference Table
- Transitional Seasons: The Tricky Weeks
- Adjusting for Altitude and Humidity
- Frequently Asked Questions
Summer vs. Winter Sourdough Adjustments
Adjust sourdough for hot summers and cold winters with starter ratios, water temperature, bulk timing, and proofing cues.
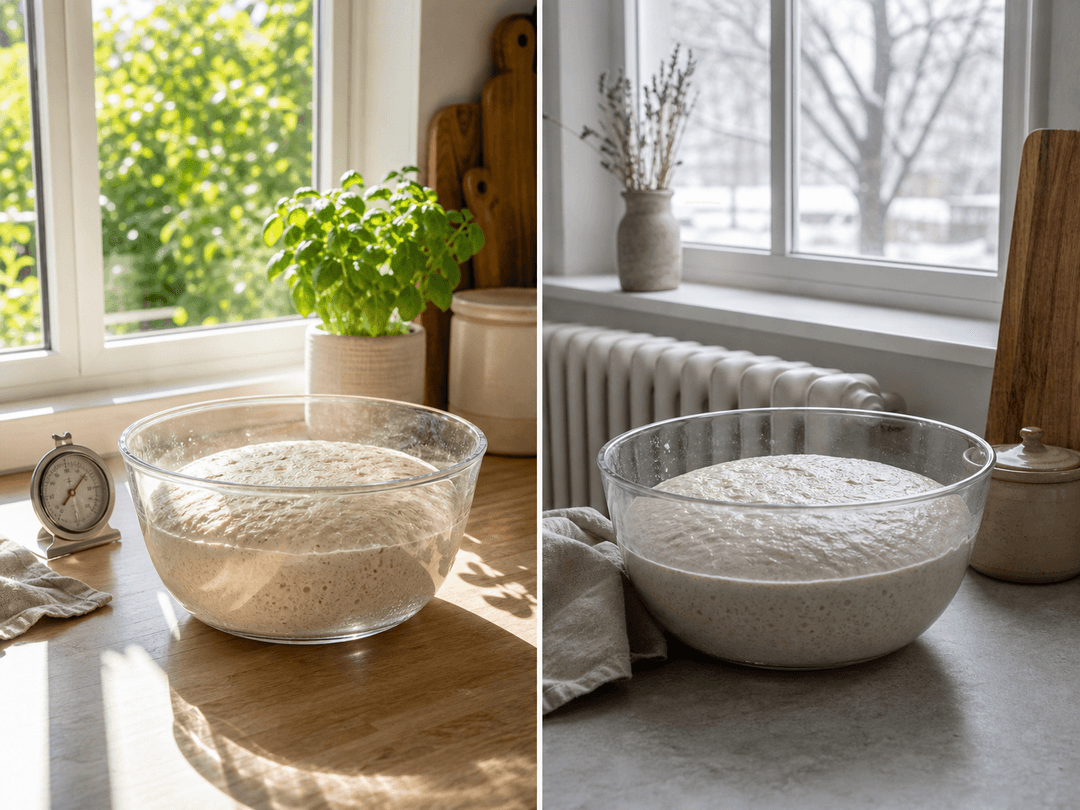
You followed the recipe perfectly. Measured every ingredient. Timed every step. The bread came out beautifully in October — tall, open crumb, crisp ears from the score. Then January arrived and the same recipe produced a dense, pale, under-proofed brick. Or July hit and the dough turned into a slack, sticky puddle before you even finished your stretch and folds.
The recipe did not change. The season did.
Temperature is the single most powerful variable in sourdough baking, and it shifts constantly with the seasons. A kitchen that sits at a comfortable 23 °C in spring can climb to 30 °C in August and drop to 16 °C in February. Every degree matters. Fermentation rate roughly doubles with every 10 °C increase — meaning the exact same dough ferments nearly twice as fast in a hot summer kitchen as it does in the same kitchen in winter.
This guide teaches you how to adjust every part of your sourdough process — starter feeding, water temperature, inoculation percentage, bulk fermentation, and proofing — so you can bake consistently great bread in any season.
Why the Same Recipe Fails in Different Seasons
A sourdough recipe is a snapshot of one baker's conditions on one day. When the author writes "bulk ferment for 4 hours," they are describing what happened at the temperature their kitchen was that day — likely somewhere around 22-25 °C. The recipe does not include an invisible footnote that reads: "This timing assumes a room temperature of 23 °C, a flour temperature of 23 °C, a levain temperature of 24 °C, and a starter that was fed 6 hours ago at 1:5:5."
But that is exactly the information you need. Without it, you are guessing — and when seasons change, the guesses stop working.
There are three reasons the same recipe produces wildly different results across seasons:
1. Fermentation speed changes. Yeast and lactic acid bacteria are living organisms. Their metabolic rate is directly governed by temperature. At 27 °C, they work roughly twice as fast as at 17 °C. A 4-hour bulk at 24 °C becomes a 2.5-hour bulk at 28 °C — and a 7-hour bulk at 18 °C.
2. The acid balance shifts. Warmer temperatures favor lactic acid (mild, creamy) over acetic acid (sharp, tangy). Your bread tastes different in summer versus winter even if fermentation timing were identical — which it never is.
3. Your starter changes. The microbial balance in your starter shifts with ambient temperature. In summer, your starter ferments faster, peaks sooner, and can become over-ripe before you realize it. In winter, it sluggish, peaking later and sometimes not reaching full activity between feedings.
Understanding these three effects is the foundation for seasonal adjustment. Everything that follows builds on them.
Temperature: The Master Variable
Before discussing specific seasonal strategies, it is worth establishing why temperature dominates everything else.
The Q10 rule — a principle from biochemistry — states that for every 10 °C increase in temperature, the rate of a biological reaction approximately doubles. This applies to both yeast fermentation (gas production) and bacterial fermentation (acid production), though not at exactly the same rate.
In practical terms:
| Kitchen temperature | Relative fermentation speed | Effect on a "4-hour bulk" recipe |
|---|---|---|
| 18 °C (64 °F) | 0.5x baseline | ~7-8 hours needed |
| 22 °C (72 °F) | 0.75x baseline | ~5-6 hours needed |
| 25 °C (77 °F) | 1x baseline (reference) | ~4 hours (as written) |
| 28 °C (82 °F) | 1.5x baseline | ~2.5-3 hours needed |
| 32 °C (90 °F) | 2x+ baseline | ~2 hours or less — danger zone |
These numbers are approximations. The actual speed depends on your specific starter culture, flour type, hydration, and inoculation percentage. But the pattern is consistent: every few degrees makes a meaningful difference, and seasonal swings of 10-15 °C between winter and summer can double or halve your fermentation timeline.
The solution is not to fight temperature. It is to measure it and adjust your process accordingly.
The Desired Dough Temperature Formula
The most powerful tool for seasonal consistency is the Desired Dough Temperature (DDT) formula. Professional bakers use it every single day because it turns temperature from an unpredictable nuisance into a controlled variable.
Water temp = (DDT x 3) - (flour temp + room temp + levain temp)
Your target DDT for most sourdough is 24-26 °C (75-78 °F). This range produces a predictable fermentation window of 3.5-5 hours with 10% starter.
Summer Example
It is August. Your kitchen is 29 °C, your flour is 27 °C (stored in a warm pantry), and your levain is 28 °C.
Water temp = (25 x 3) - (27 + 29 + 28) = 75 - 84 = -9 °C
Negative. You literally cannot make the water cold enough using tap water alone. This is where ice water comes in — or even adding ice directly to the dough water and calculating the effective temperature.
In practice, mixing with water at 3-5 °C (straight from the fridge) and accepting an FDT of 26-27 °C is a realistic summer approach. You then compensate by reducing starter percentage and shortening bulk.
Winter Example
It is January. Your kitchen is 17 °C, your flour is 16 °C, and your levain is 19 °C.
Water temp = (25 x 3) - (16 + 17 + 19) = 75 - 52 = 23 °C
Barely warm. Room-temperature water is almost right. In very cold kitchens, the formula might call for water at 30-35 °C — warm to the touch but not hot enough to damage the yeast.
Why It Matters
Without DDT awareness, summer bakers unknowingly start with dough at 28-30 °C and wonder why everything over-ferments. Winter bakers start with dough at 18-20 °C and cannot understand why their bread is dense after following the recipe's timing. The DDT formula closes the gap between what the recipe assumes and what your kitchen actually delivers.
Summer Adjustments: Slowing Everything Down
Hot weather is the more dangerous direction for sourdough because over-fermentation is harder to reverse than under-fermentation. A dough that has gone too far cannot be wound back — the gluten is degraded, the sugars are consumed. Prevention is everything.
Starter Management in Summer
Your starter ferments faster in summer. A culture that takes 8 hours to peak in winter may peak in 4 hours during a heat wave. If you feed it on your usual schedule, it may be well past its peak — over-ripe — by the time you use it.
Adjustments:
- Increase the feeding ratio. Move from 1:5:5 (starter:flour:water) to 1:8:8 or even 1:10:10. More flour and water relative to starter means more food to consume, which extends the time to peak.
- Use cold water for feedings. Water at 10-15 °C instead of room temperature slows the starter's metabolic rate right from the moment you feed it.
- Feed more frequently. In extreme heat (above 30 °C), your starter may need feeding every 8-10 hours instead of every 12-24 hours to stay healthy and not become excessively acidic.
- Refrigerate between bakes. If you are not baking daily, keep your starter in the fridge. Pull it out 1-2 feedings before bake day to revive it.
- Catch it on the rise, not at peak. Use your starter when it is actively rising — about 75% of the way to peak — rather than waiting for full peak. An ascending starter has vigorous yeast activity without the excess acid of one that has already turned.
Water Temperature
Use cold water. In a truly hot kitchen, use ice water. Calculate the DDT and do whatever it takes to bring the mixed dough to 25-26 °C. If you cannot get there, accept the warmer dough temperature and adjust your timeline accordingly.
Some summer bakers pre-chill their flour in the refrigerator overnight. This drops the flour temperature by 5-10 °C and makes it much easier to hit the target DDT with merely cold (not ice) water.
Inoculation Percentage
This is one of the most effective summer levers. Reducing the amount of starter in your dough directly slows fermentation because there are fewer yeast and bacteria at the outset.
| Season | Typical inoculation | Effect |
|---|---|---|
| Winter (cold kitchen) | 15-20% | More organisms to compensate for slow conditions |
| Spring/Autumn (moderate) | 10% | Standard baseline |
| Summer (hot kitchen) | 3-7% | Fewer organisms to slow the fast conditions |
Some experienced bakers in hot climates use as little as 2-3% inoculation in peak summer, letting the dough bulk slowly over 5-6 hours even at 28 °C. The lower the inoculation, the longer the bulk — and the more forgiving the process becomes.
Bulk Fermentation
In summer, bulk fermentation runs fast and the window between "ready" and "over-fermented" narrows. Three strategies help:
-
End bulk earlier. Shape at 30-40% rise instead of the 50-60% you might target in moderate weather. The dough will continue fermenting aggressively during shaping and even during the first 1-2 hours of cold retard before the core temperature drops.
-
Bulk in the coolest spot. An interior closet, a basement, or an air-conditioned room can be 3-5 °C cooler than the kitchen counter next to a sunny window. Small differences matter.
-
Start early. Mix your dough at 5-6 AM when the kitchen is coolest. By the time you shape in late morning, the heat has not yet reached its peak.
Cold Retard Strategy
Cold retarding is particularly valuable in summer. It arrests fermentation quickly, provides scheduling flexibility, and gives you the firm, cold dough that scores cleanly and springs well.
Shape and refrigerate immediately after ending bulk. Do not leave shaped dough at room temperature for any significant time in a hot kitchen — it will continue fermenting rapidly.
Consider a slightly shorter retard in summer (10-14 hours instead of 16-24) because the dough entered the fridge warmer and had more fermentation momentum. Alternatively, retard for the full 16-24 hours but accept a tangier result.
Winter Adjustments: Giving Fermentation the Help It Needs
Cold weather slows everything. Your starter is sluggish, your dough barely rises, and your bread comes out dense and bland. The fix is not patience alone — although patience helps — but active intervention to create conditions where fermentation can proceed at a reasonable pace.
Reviving a Cold Starter
A starter kept in a cold kitchen (below 18 °C) may barely double between feedings. It is not dead — it is just cold. But using a sluggish starter produces sluggish dough.
Adjustments:
- Use warm water for feedings. Water at 30-35 °C gives the starter a thermal boost. The culture will be noticeably more active within one feeding cycle.
- Keep the starter in a warm spot. The top of the refrigerator (warm from the compressor), near a radiator, or inside the oven with just the light on — any spot that maintains 25-28 °C will keep the starter active.
- Decrease the feeding ratio temporarily. Moving from 1:5:5 to 1:3:3 means less food to consume before peaking, which compensates for the slower metabolic rate in a cold kitchen.
- Build a levain the night before. If your starter is cold and sluggish, build a small levain (50 g starter + 100 g flour + 100 g water) in the evening, keep it in a warm spot overnight, and use it at peak the next morning. This gives you a vigorous, active levain regardless of how cold your kitchen is.
Water Temperature
The DDT formula typically calls for warm water in winter — anywhere from 25-38 °C depending on how cold your flour and kitchen are. This is one of the simplest adjustments and makes an immediate difference.
Do not use water above 40 °C. At that temperature, you risk killing yeast and denaturing proteins. Warm — not hot — is the goal.
Inoculation Percentage
Increase it. Where you might use 10% in moderate weather, move to 15-20% in a cold kitchen. More starter means more organisms working from the start, partially compensating for the reduced activity at lower temperatures.
Some winter bakers push to 25% or higher when the kitchen drops below 16 °C. The tradeoff is a more acidic dough — more starter means more acid introduced at mixing — but this can be desirable for a tangy winter loaf.
Creating a Warm Spot
In a cold kitchen, the single most impactful change is creating a warm microclimate for your dough.
The oven light trick: Turn on only the interior light in your oven and close the door. Most ovens maintain 26-30 °C this way — an ideal fermentation temperature. Test with a thermometer first, and crack the door slightly if it runs too warm.
Proofing box: A dedicated proofing box (essentially a temperature-controlled enclosure) is the gold standard. Set it to 25-27 °C and forget about ambient temperature entirely. Worth the investment if you bake weekly or more.
DIY warm spot alternatives:
- Place the dough container on top of the fridge
- Set it near a radiator (not directly on it — indirect warmth, not heat)
- Use a heating pad on low under a towel, with the dough container on top
- Wrap the container in towels for insulation — this will not add heat, but it slows heat loss
Bulk Fermentation
In cold conditions, bulk fermentation takes longer. Expect 6-8 hours at 18-20 °C versus 3.5-4.5 hours at 24 °C. The key is to be patient and watch the dough, not the clock.
Push to a higher rise. In a cold kitchen, target 75-100% volume increase before shaping. Because fermentation is slow, the dough will barely advance during shaping and cold retard. You need to front-load the fermentation during bulk.
Extend your fold window. You can perform 4-6 sets of stretch and folds over 2-3 hours because the dough develops more slowly. This builds excellent gluten structure.
Consider overnight room-temperature bulk. In a kitchen that stays at 17-20 °C overnight, you can mix in the evening with 3-5% starter, let the dough bulk-ferment while you sleep, and shape in the morning. The slow, cold fermentation develops outstanding flavor — complex and tangy.
Proofing Adjustments
If you cold-retard, extend the retard slightly in winter — 16-24 hours instead of 12-16 — because the dough entered the fridge with less fermentation momentum. The additional time allows the slow bacterial activity to develop flavor.
If you bake same-day without a cold retard, proof in a warm spot (oven light, proofing box) and use the poke test to judge readiness. Do not rely on time — a same-day proof at 18 °C could take 3-4 hours versus 1-2 hours at 25 °C.
Spring and Autumn: The Easy Seasons
Spring and autumn, with kitchen temperatures typically in the 20-24 °C range, are when most sourdough recipes work as written. Fermentation runs at a moderate pace, starter behaves predictably, and the window between under and over-fermentation is comfortably wide.
If you are developing your own sourdough recipe or learning a new technique, these are the seasons to do it. Your baseline numbers — bulk time, rise percentage, starter feeding schedule — established in spring or autumn become the reference point that you adjust up or down for summer and winter.
Keep notes during these seasons. Record your kitchen temperature, FDT, bulk time, rise percentage, and results. These moderate-season records are your calibration data for the rest of the year.
Seasonal Quick-Reference Table
Here is a summary of how to adjust the key variables by season. All values assume a standard wheat sourdough at 70-75% hydration.
| Variable | Summer (27 °C+) | Spring/Autumn (20-25 °C) | Winter (below 19 °C) |
|---|---|---|---|
| Starter feeding ratio | 1:8:8 to 1:10:10 | 1:5:5 | 1:3:3 to 1:5:5 |
| Inoculation % | 3-7% | 8-12% | 15-25% |
| Water temperature | 3-10 °C (ice/fridge water) | 18-23 °C (room temp) | 28-38 °C (warm) |
| Target DDT | 24-26 °C | 24-26 °C | 24-26 °C |
| Bulk duration | 2-4 hours | 4-6 hours | 6-10 hours |
| Shape at rise % | 30-40% | 50-60% | 75-100% |
| Stretch and folds | 2-3 sets, finish quickly | 3-4 sets, standard pace | 4-6 sets, extended window |
| Cold retard | 10-16 hours | 12-18 hours | 16-24 hours |
| Bulk location | Coolest room, away from sun | Counter is fine | Warm spot (oven light, proofing box) |
The DDT target stays the same across all seasons — that is the whole point. You use water temperature, inoculation, and environment to hit that target regardless of what the weather is doing outside.
Transitional Seasons: The Tricky Weeks
The most dangerous periods are the transitions — the first warm week of late spring, the first cold snap of autumn. Your muscle memory is calibrated for the previous season, but conditions have shifted. The bread that worked last week suddenly fails.
Pay extra attention to temperature during transitions. Measure your kitchen temperature, flour temperature, and levain temperature before every bake — not just occasionally. The DDT formula catches the shift before your instincts do.
Spring is particularly tricky because daytime temperatures can swing 10 °C or more between a sunny afternoon and a cool evening. If you mix dough at 3 PM in a sun-warmed kitchen (26 °C) but bulk overnight as the kitchen drops to 18 °C, the dough effectively stalls. Either mix earlier in the day and finish bulk before the temperature drops, or compensate with a higher inoculation to front-load fermentation.
Autumn's cold snaps catch many bakers off guard. A sudden drop from 22 °C to 16 °C can double your bulk time overnight. If your bread suddenly seems under-proofed and you have not changed anything about your recipe, check the thermometer — the season may have changed before you noticed.
Adjusting for Altitude and Humidity
Temperature is the dominant seasonal variable, but humidity and altitude can amplify its effects.
Humidity: Summer often brings higher humidity, which affects flour hydration. Flour absorbs moisture from the air, effectively increasing your dough's hydration without you adding extra water. In very humid climates, reduce your water by 2-5% from your standard formula during humid months. In dry winter air, you may need to add 1-3% more water to maintain the same dough consistency.
Altitude: Higher altitude means lower atmospheric pressure, which allows dough to rise faster. If you bake above 1,000 meters, fermentation feels faster at any given temperature. Reduce inoculation or shorten bulk slightly to compensate. The effect stacks with summer heat — a hot kitchen at altitude is the fastest-fermenting combination you can encounter.
Frequently Asked Questions
Why does my sourdough recipe work in autumn but fail in summer?
Because your kitchen temperature is higher in summer, fermentation runs much faster. A recipe written for 23 °C conditions produces over-fermented dough at 28 °C if you follow the same timing. Reduce your starter percentage to 3-7%, use ice water, and end bulk at 30-40% rise instead of 50-60%.
How do I bake sourdough in a very hot kitchen (30 °C+)?
Use ice water for mixing, reduce inoculation to 3-5%, mix at dawn when the kitchen is coolest, bulk in the coolest room, end bulk at 30-35% rise, and cold retard immediately after shaping. Pre-chilling flour in the refrigerator overnight also helps. Many excellent sourdough bakers work in tropical climates — the process just requires more adjustment.
My sourdough is always dense in winter. What am I doing wrong?
Your kitchen is too cold for the recipe's timing. The most common mistake is following a 4-hour bulk time in an 18 °C kitchen — the dough needs 7-8 hours at that temperature. Use warmer water (28-35 °C), increase starter to 15-20%, create a warm spot (oven with light on), and push bulk to 75-100% rise before shaping. Watch the dough, not the clock.
Should I change my starter feeding schedule for different seasons? Yes. In summer, increase your feeding ratio (1:8:8 or higher) and consider feeding more frequently. In winter, decrease the ratio (1:3:3) or keep the starter in a warm spot so it stays active. A starter that cannot reliably double within 4-6 hours of feeding at room temperature is not ready to leaven bread.
What is the Desired Dough Temperature (DDT) and why does it matter for seasonal baking? DDT is the target temperature of your mixed dough. The formula — Water temp = (DDT x 3) - (flour temp + room temp + levain temp) — tells you what water temperature to use to hit your target. Aiming for 24-26 °C DDT year-round is the single most effective strategy for consistent seasonal results because it neutralizes ambient temperature differences.
How much should I change my starter percentage between summer and winter?
The range is dramatic. Some bakers use 3% in peak summer and 20% in deep winter. A more typical swing is 5-7% in summer to 15% in winter. The exact numbers depend on your kitchen temperature, starter strength, and how long you want bulk to take.
Can I use a proofing box to avoid seasonal adjustments entirely? A proofing box eliminates the temperature variable, which is the biggest seasonal factor. Set it to 25-27 °C and your fermentation timeline stays consistent year-round. You still need to adjust water temperature (the DDT formula still applies) and monitor your starter, but the bulk fermentation itself becomes predictable.
Why does my bread taste different in summer versus winter? Temperature shifts the balance between lactic acid (mild, creamy, dominant at warmer temperatures) and acetic acid (sharp, tangy, dominant at cooler temperatures). Summer bread baked quickly in a warm kitchen tends toward a milder flavor. Winter bread, with its longer fermentation at cooler temperatures, develops more tang. Controlling your DDT and using cold retard can help maintain a consistent flavor profile year-round.
What is the biggest mistake bakers make with seasonal adjustments? Following recipe times instead of reading the dough. A recipe that says "bulk for 4 hours" is only correct at the temperature it was developed at. In a different season, the time could be half or double that. Use an aliquot jar, track volume rise, and learn to read visual and tactile cues. Time is a rough guideline — the dough is the authority.
Is overnight bulk fermentation easier in summer or winter?
Winter. An overnight room-temperature bulk works best when the kitchen stays at 17-20 °C and you use 3-5% starter. The dough ferments slowly over 10-14 hours and is ready to shape in the morning. In summer, the same approach risks severe over-fermentation by morning unless you use a very low inoculation (1-2%) or refrigerate the dough overnight instead.